
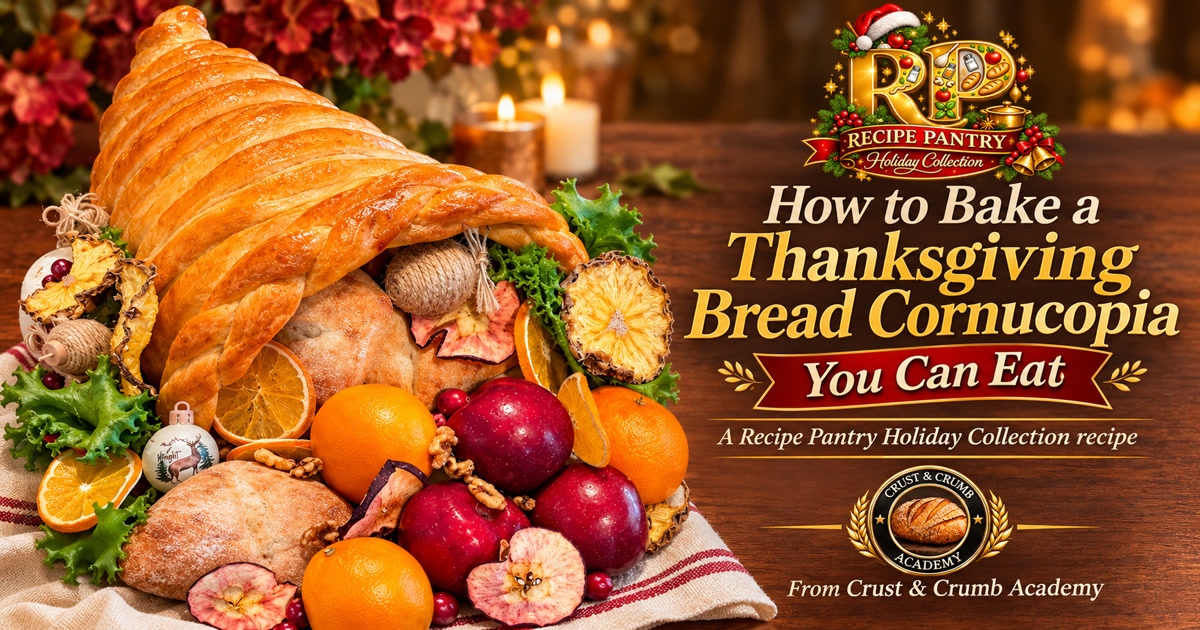
A bread cornucopia is the one Thanksgiving centerpiece your guests can tear apart and eat. Here’s how I build mine: a foil form, strips of firm dough, a braided rim, and a short proof.

A bread cornucopia is a hollow horn of plenty made from yeasted dough. You shape a cone from heavy-duty aluminum foil, wrap it in overlapping strips of dough from the tail to the mouth, and finish the opening with a three-strand braid. Then you brush it with egg wash, sprinkle on turbinado sugar, and bake at 350°F (175°C) until the thickest part reads 195 to 200°F (90 to 93°C). After a short cool you pull the foil out, dry the shell for a few minutes, and fill it with rolls, fruit, and nuts. Hands-on time is about 45 minutes. Start to finish is roughly four and a half hours, and most of that is rising, baking, and cooling.

Bread cornucopia at a glance
- Yield: one horn about 14 inches (35 cm) long, enough for 10 to 12 people to tear into
- Hands-on time: 45 minutes
- Rise and proof: about 1 hour 35 minutes
- Bake: 45 to 50 minutes at 350°F (175°C), plus 10 minutes to dry the inside
- Done when: the thickest part of the braid reads 195 to 200°F (90 to 93°C)
- Skill level: intermediate. If you can roll out dough and braid three strands, you can make this.
Why bread cornucopia dough has to be firm
The look of the horn comes from the ridges where one strip of dough overlaps the next. Soft sandwich dough can’t hold that edge. It puffs, the strips melt into each other, and you end up with a smooth lump shaped vaguely like a horn.
So this dough is stiffer on purpose: 600 g of bread flour to 300 g of water, with one egg and a little butter and sugar for color and tenderness. It should feel smooth and firm when you finish kneading, and barely tacky. If it feels like dinner roll dough, knead in a tablespoon of flour.

Ingredients
Dough
- 600 g (5 cups) bread flour, spooned and leveled
- 300 g (1 1/4 cups) warm water, about 90°F (32°C)
- 50 g (1 large) egg
- 42 g (3 tablespoons) unsalted butter, softened
- 38 g (3 tablespoons) granulated sugar
- 11 g (2 teaspoons) fine sea salt
- 6 g (2 teaspoons) instant yeast
Finish
- 50 g (1 large) egg, beaten with 15 g (1 tablespoon) water
- 25 g (2 tablespoons) turbinado sugar
- 15 g (1 tablespoon) neutral oil or cooking spray, for the foil form
You’ll also need heavy-duty aluminum foil, a half sheet pan, parchment, a rolling pin, a pizza wheel or bench knife, a pastry brush, and an instant-read thermometer.
The full recipe, with scaling, a grams and cups toggle, timers, and a printable version, is in the Recipe Pantry: Thanksgiving Bread Cornucopia.
How to build the foil form for a bread cornucopia
The form decides the shape, so give it five careful minutes. Build it while the dough is on its first rise.

- Roll the cone. Tear off about 30 inches (75 cm) of heavy-duty foil and roll it into a cone about 14 inches (35 cm) long with a mouth about 6 inches (15 cm) across. Fold the edge of the mouth inward to stiffen it.
- Stuff it. Pack the cone with loose balls of crumpled foil so it won’t sag under the dough. Loose balls, not one solid brick. You have to pull them out later.
- Curl the tail. Bend the last 4 inches (10 cm) of the tip up and off to one side.
- Smooth the outside. Wrap one fresh sheet of foil around the whole form and press it flat. Wrinkles grab dough. Smooth foil lets go.
- Flatten the bottom. Press the form on the counter so it has a side to sit on, then check that it fits your sheet pan corner to corner.
- Oil it well. Coat the entire outside, right down into the curl of the tail.
The foil form isn’t my invention. Home bakers have been wrapping dough around foil and disposable pizza pans for years, and Fleischmann’s has a whole wheat version built on a folded pizza pan if you’d like to compare methods.
How to make a bread cornucopia, step by step
- Mix the dough. Put all the dough ingredients in the bowl. In a stand mixer, run on low for 3 minutes, then medium-low for 6 to 8 minutes. By hand, knead 10 to 12 minutes. You want smooth, firm dough around 76 to 78°F (24 to 26°C).
- First rise. Cover and let it rise 60 to 75 minutes at about 75°F (24°C), until nearly doubled.
- Build the form. Use the six steps above while the dough rises, and set the oiled form on a parchment-lined sheet pan.
- Divide. Turn the dough out without kneading it again. Cut off 240 g for the braid, and divide the rest into two pieces of about 400 g. Cover and rest 10 minutes.
- Roll and cut the strips. Roll each 400 g piece into a rectangle 15 x 7.5 inches (38 x 19 cm), about 3/16 inch (5 mm) thick. Cut each one lengthwise into five long strips, 1.5 inches (4 cm) wide. If the dough springs back, cover it and give it 5 minutes. Don’t fight it.
- Wrap the form. Start at the tip. Pinch the end of the first strip around the point and wind toward the mouth, overlapping each pass by 1/2 inch (1.25 cm). When a strip runs out, pinch the next one onto it on the underside. Lay the strips on. Don’t pull them tight.
- Braid the rim. Divide the 240 g piece into three ropes of 80 g, each 26 inches (66 cm) long. Braid them, brush the last strip at the mouth with a little egg wash, lay the braid around the rim, and pinch the ends together underneath.
- Proof. Cover loosely for 20 to 30 minutes, until the strips look slightly puffy. Not doubled. Heat the oven to 350°F (175°C) with a rack in the lower third. If you’re new to judging this stage, my guide to proofing yeasted dough walks through what to look for.
- Egg wash and sugar. Brush the whole surface, working the wash into the creases of the braid without letting it pool at the base, then sprinkle with turbinado sugar. A whole egg wash is what gives you that golden shine. I break down the options in Bread Washes: What to Use and When.
- Bake. Bake 20 minutes and rotate the pan. Once the color is deep golden, usually around the 25 to 30 minute mark, tent loosely with foil. Keep going to 45 to 50 minutes total, until the braid reads 195 to 200°F (90 to 93°C).
- Release the foil and dry the inside. Cool on the pan 10 to 15 minutes. While the bread is still warm, pull the foil balls out through the mouth, collapse the form inward, and ease it out. Then put the hollow horn back in the oven at 300°F (150°C) for 10 minutes to set the inner wall.
- Cool and fill. Cool on a rack for about an hour, then load it up.

Four mistakes that ruin a bread cornucopia
Pulling the strips tight
The dough still has growing to do, in the proof and again in the first minutes of the bake. A strip stretched tight around the form has nowhere to go, so it thins out and tears, usually at a seam. Lay each strip on relaxed and keep the full half inch of overlap.
Proofing too long
This is not a loaf you proof until doubled. Twenty to thirty minutes, slightly puffy, and into the oven. Go longer and the ridges soften into each other.
Taking the foil out early
The form stays inside through the proof, the egg wash, and the entire bake. It comes out only after the bread has baked and cooled for 10 to 15 minutes. Pull it sooner and the horn collapses.
Trusting the color
Egg wash and sugar brown early, so the outside can look finished while the braid is still doughy in the middle. Tent it and go by the thermometer.
Filling and serving your bread cornucopia
Set the bread cornucopia where it’s going to live before you load it, because a full one is heavy and awkward to move. Slip a piece of parchment or a cloth napkin inside the mouth so nothing damp sits against the bread. Then let dinner rolls tumble out of the opening and build outward with apples, oranges or clementines, fresh cranberries, and walnuts. Dried orange, apple, and pineapple slices add color and keep for days. Tuck curly lettuce or kale around the base, on the platter, not on the bread.
For the rolls, my yeasted dinner rolls are soft, simple, and the right size for the job.

Can you make a bread cornucopia ahead?
Yes. If you plan to eat your bread cornucopia, bake it the day before, cool it completely, cover it loosely with a clean towel, and warm it for 5 to 8 minutes at 300°F (150°C) before it goes on the table. If it’s only for show, a fully dried horn holds at room temperature for several days. It’ll be hard by then, so plan on looking, not eating.

From festive breads and holiday favorites to sweet treats worth sharing, our Holiday Baking Guide brings together recipes, baking tips, and seasonal inspiration to help you create something special this year.
🍞 Explore the recipes in our Recipe Pantry and make this holiday season one to remember!
Bread cornucopia FAQ
Can you really eat a bread cornucopia?
Yes. It’s bread. Tear from the mouth end and work back toward the tail. It’s at its best the day it’s baked or the day after.
Can I use store-bought dough?
You can. Use 2 pounds (907 g) of thawed frozen bread dough in place of the homemade dough, then roll, cut, and wrap the same way. Keep it cool while you work so the strips hold their edges.
Why did my strips tear in the oven?
They were stretched when you wrapped them, or the overlap was too narrow. Relaxed strips and a full 1/2 inch (1.25 cm) of overlap fix both.
The foil won’t come out. What do I do?
Work while the bread is still warm. Take the stuffing out first so the form has room to collapse, then fold the foil in on itself and work from the mouth toward the tail. Nonstick foil for the outer wrap makes this easier next time.
The tail is browning faster than the rest. Is that normal?
It is. The tip is thin, so it colors first. Cap it with a small piece of foil as soon as it’s the color you want, and tent the whole horn later.
Can I make it with sourdough?
This version is written and timed for instant yeast. A sourdough dough will wrap the same form, but your rise times change, and you’ll want to keep the dough just as firm.

Get the full recipe in the Recipe Pantry
The complete Thanksgiving Bread Cornucopia recipe is in the Recipe Pantry. Scale it up or down, switch between grams and cups, run the timers, and print it for the counter.
Ready to take your baking further?

Reading about bread is one thing. Baking it alongside people who get it is another. That’s what we do inside Crust & Crumb Academy. Every Saturday we bake the same loaf together, share photos, troubleshoot in real time, and cheer each other on. Whether you’re shaping your first boule or chasing the perfect crumb, you’ll have a whole room of bakers in your corner.
Come bake with us 👉 Join Crust & Crumb Academy
Fresh flour starts with fresh grain
As a NutriMill affiliate, I earn a commission from qualifying purchases that goes right back into this community.
Save $20 on the NutriMill Classic Grain Mill with code ACADEMY26.
Leave a Reply