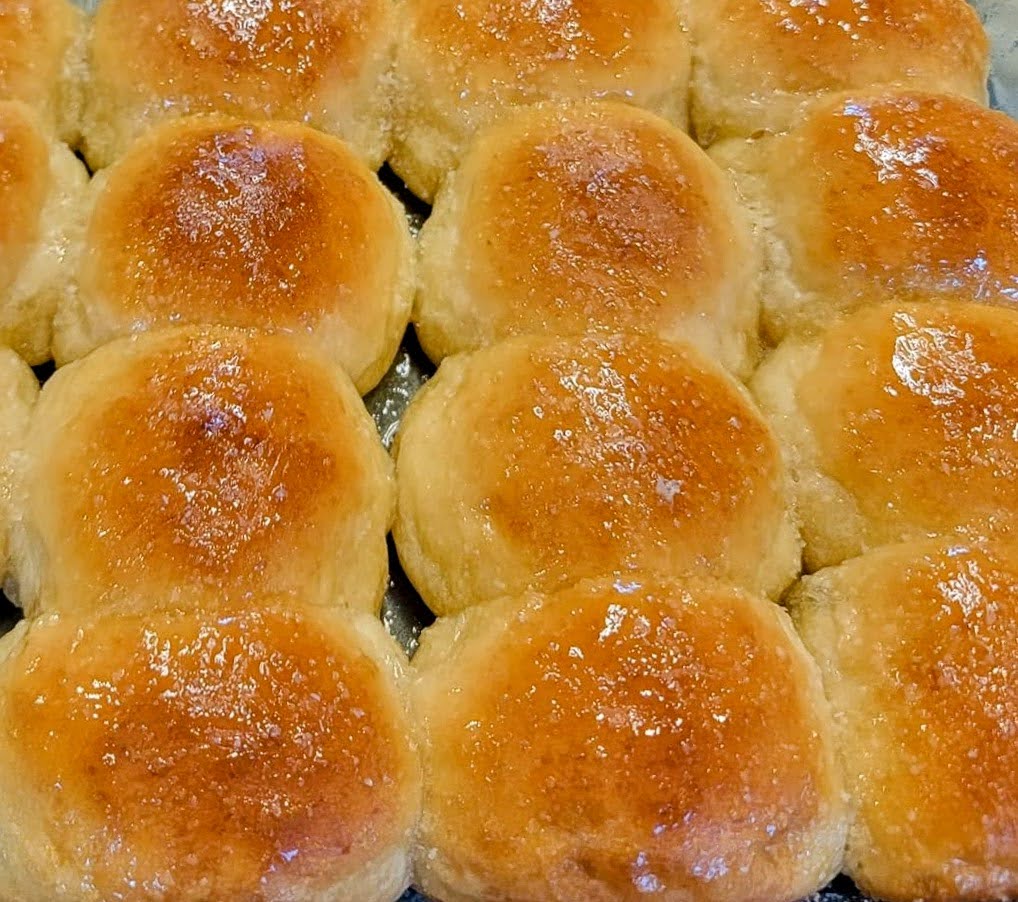
Sundays are my days to experiment, and it always makes me feel better about the week. That’s one of my favorite parts about baking — you get to eat your mistakes! Today, Marjorie Woodworth gave me a challenge I gladly took on. Like her, I’m trying to make healthier choices. These sweet rolls are a sugar-free alternative to the soft, fluffy rolls we all love. I did the math, crossed my fingers, and here’s what we came up with. Let’s get baking!

Sweet Rolls with Stevia: A Baking Experiment
The Science Behind the Recipe
Feeding the Yeast
Yeast needs sugar to thrive, and since we’re using stevia (which doesn’t feed yeast), I added 1 tablespoon (15 ml) of honey. This gives the yeast just enough food to create a fluffy rise. The small amount of honey won’t make the rolls overly sweet, but it’s a key adjustment when replacing sugar.
Adjusting for Moisture
Without sugar, the dough can lose some moisture. To balance this, I added extra warm milk — 240 ml (1 cup) — ensuring the dough stays soft and pliable. If the dough feels dry, add more milk one tablespoon at a time.
Improving Texture and Browning
Sugar helps create a tender crumb and golden color. To make up for it:
- Generous amounts of unsalted butter for richness.
- A touch of honey in the dough and glaze to aid browning.
- An optional milk or egg wash for a golden finish.
Ingredients
For the Dough:
- 500 g (4 cups) bread flour
- 7 g (2 1/4 tsp) instant yeast
- 1/4 tsp powdered stevia (adjust based on your brand)*
- 1 tbsp (15 ml) honey
- 1/2 tsp salt
- 240 ml (1 cup) warm milk (around 37°C / 98°F)
- 60 g (1/4 cup) unsalted butter, melted
- 1 large egg
For the Filling:
- 50 g (1/4 cup) unsalted butter, softened
- 1/2 tsp powdered stevia
- 1 tsp ground cinnamon
For the Glaze (Optional):
- 2 tbsp cream cheese
- 2-3 tbsp milk
- 1/2 tsp honey or powdered stevia
Equipment Needed
- Large mixing bowl or stand mixer with a dough hook
- Measuring cups and spoons
- Rolling pin
- 9×13-inch baking dish
- Small bowl for glaze
- Pastry brush (for egg wash or milk glaze)

Instructions
1. Activating the Yeast:
- Warm the milk and mix it with honey.
- Sprinkle the yeast on top and let it sit for 5-10 minutes until foamy. This ensures your yeast is active.
2. Mixing the Dough:
- In a large bowl, combine bread flour, stevia, and salt.
- Add the foamy yeast mixture, melted butter, and egg. Mix until a dough forms.
- Knead the dough by hand for 8-10 minutes, or use a stand mixer with a dough hook for 5-7 minutes, until the dough is smooth and elastic.
3. First Rise:
- Place the dough in a greased bowl and cover with a clean kitchen towel.
- Let it rise in a warm spot for 1-1.5 hours, or until doubled in size.
4. Preparing the Filling:
- In a small bowl, mix the softened butter, stevia, and cinnamon into a spreadable paste.
5. Shaping the Rolls:
- Punch down the dough and roll it out into a rectangle (about 30×40 cm or 12×16 inches).
- Spread the filling evenly over the dough.
- Roll the dough tightly from the long edge into a log, then slice into 12 equal pieces.
- Arrange the rolls in a greased 9×13-inch baking dish.
6. Second Rise:
- Cover the dish with a towel and let the rolls rise for 30-40 minutes, or until puffy.
7. Baking:
- Preheat your oven to 180°C (350°F).
- Brush the tops of the rolls with milk or an egg wash for extra browning.
- Bake for 20-25 minutes, or until golden brown.
8. Glazing (Optional):
- In a small bowl, mix cream cheese, milk, and honey/stevia until smooth.
- Drizzle over the warm rolls before serving.
Baker’s Notes
- Stevia comes in different forms (powder, liquid, granulated). Follow your product’s packaging to use the equivalent sweetness of sugar. Start small and adjust as needed.
- If your rolls are pale, try increasing the oven temperature slightly to 190°C (375°F) next time.
- This is an experiment! Share your results in the comments so we can all learn together.
I can’t wait to see how yours turn out. Drop a picture or let me know if you tweak the recipe. Happy baking! 🍞
Leave a Reply