
A simple, reliable, and flavorful sourdough recipe that delivers great results every time.
Introduction
When I first started baking sourdough, I was determined to master the perfect loaf—a balance of crisp crust, soft crumb, and deep, complex flavor. I experimented endlessly, trying different methods, flour blends, and hydration levels, and what I discovered was that simplicity often wins.
This recipe is the culmination of years of trial and error. It’s been tested in kitchens around the world, shared by thousands of bakers, and designed to eliminate guesswork. Whether you’re a beginner or an experienced sourdough enthusiast, this loaf is approachable and consistent.
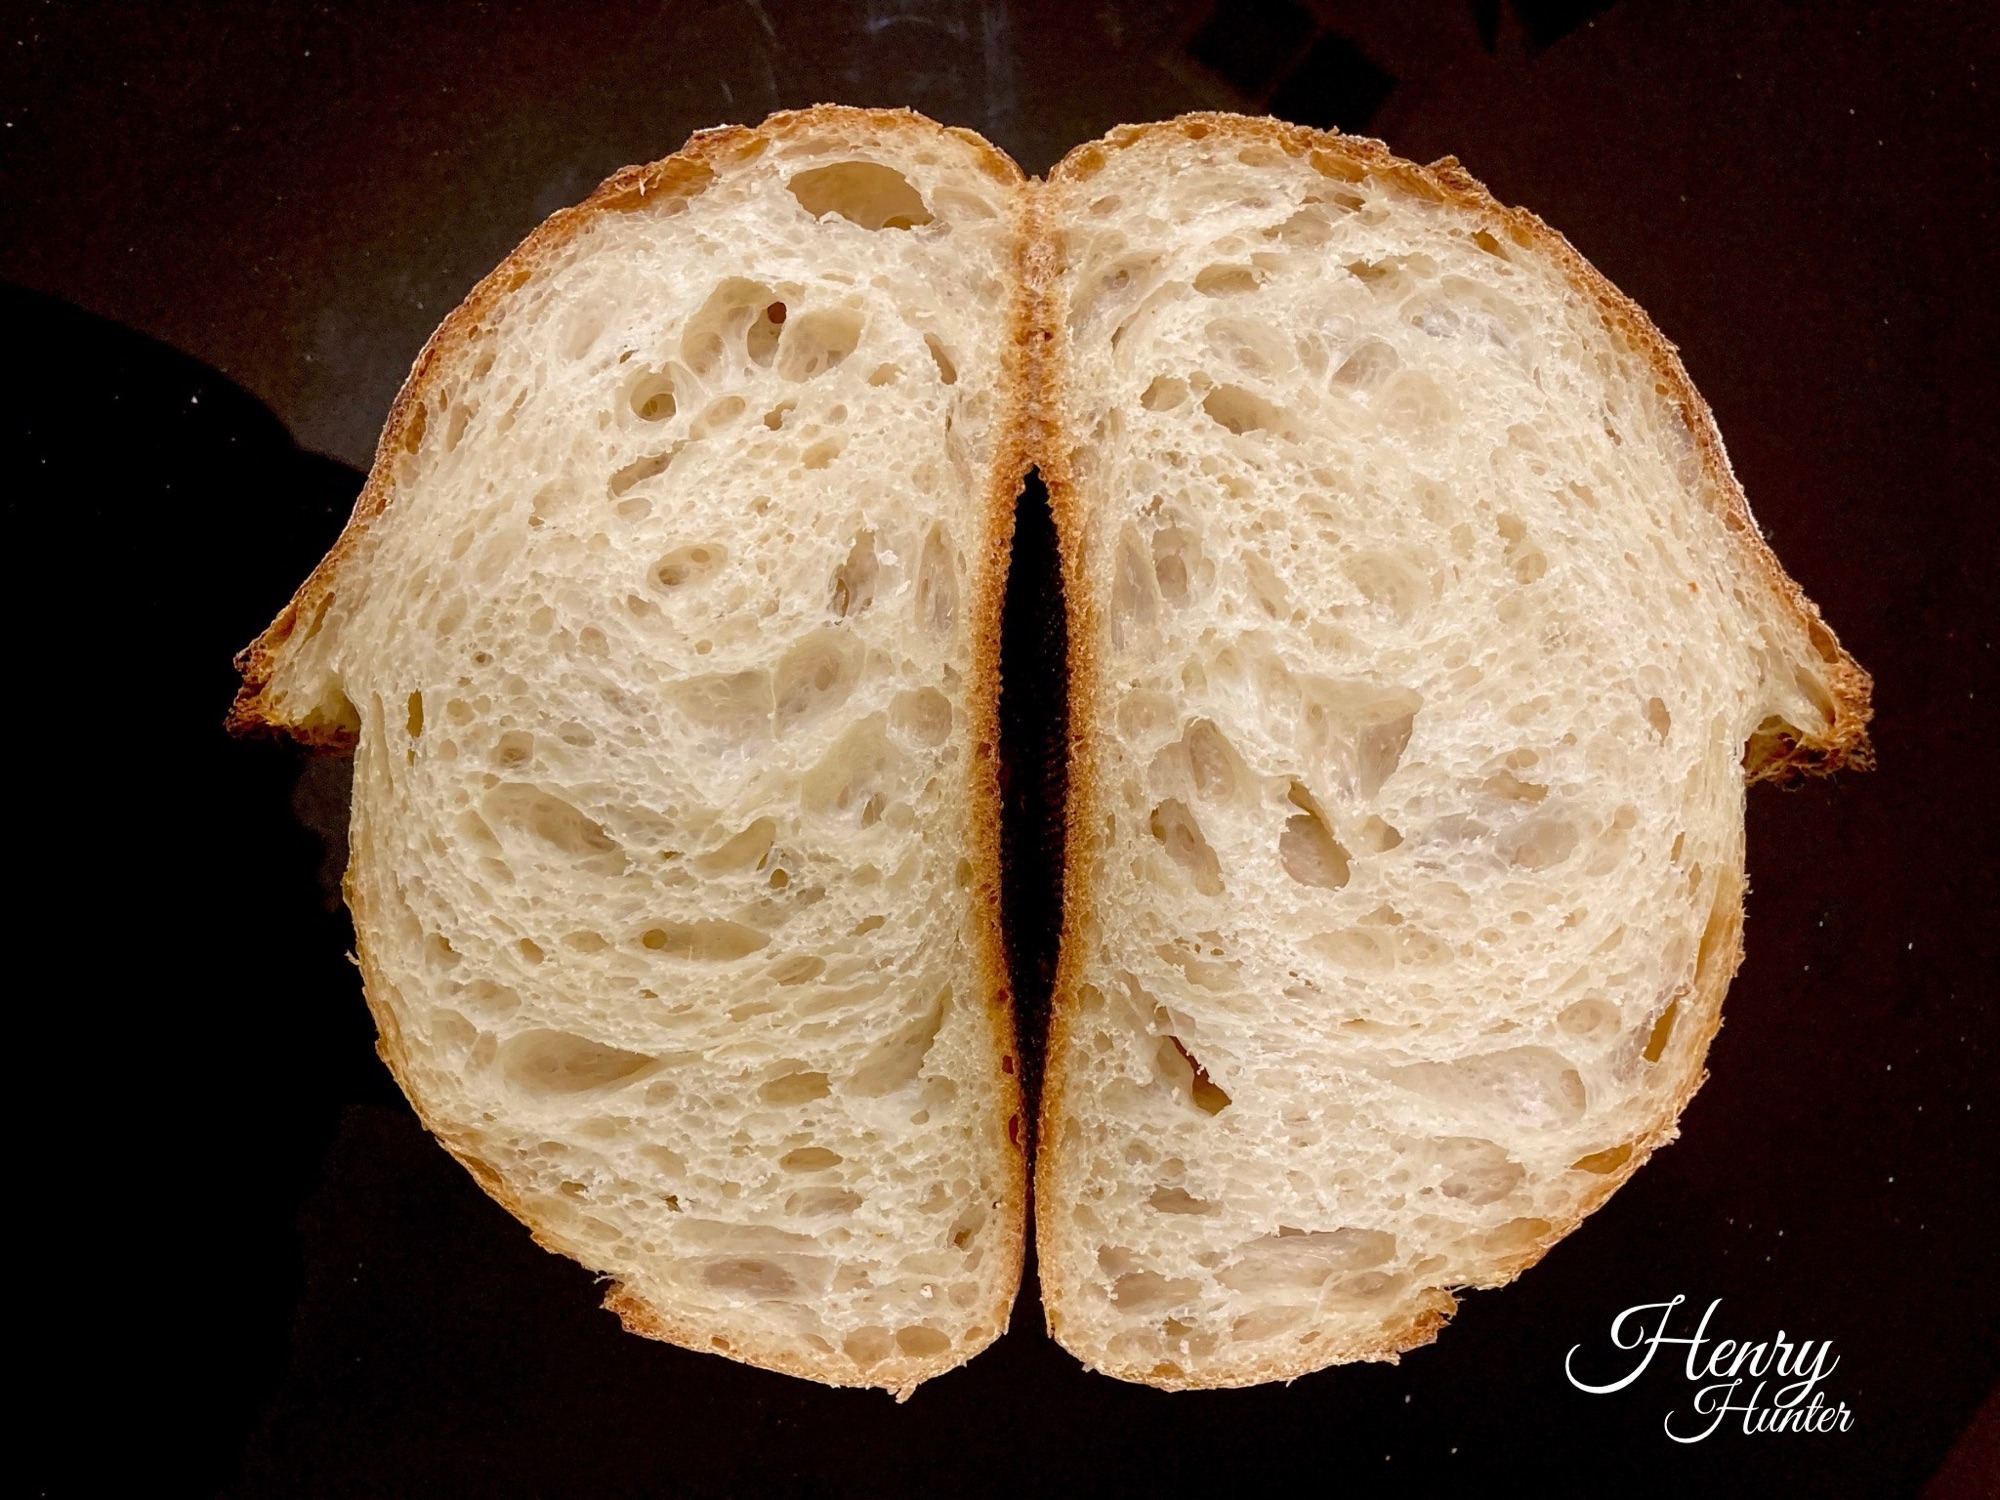
With 75% hydration and a method that prioritizes fermentation and structure, it’s as rewarding to make as it is to eat. Let’s bake!

Ingredients
(Yields one loaf)
| Ingredient | Metric | Volume (approx.) |
|---|---|---|
| Bread flour | 500g | 4 cups |
| Water (warm) | 375g | 1 ½ cups |
| Active sourdough starter | 100g | ½ cup |
| Salt | 10g | 2 tsp |
Equipment
- Mixing bowl
- Bench scraper
- Proofing basket (banneton)
- Dutch oven or Brød & Taylor Baking Shell
- Digital scale
- Lame or sharp knife for scoring
Method
1. Mix & Fermentolyse (10 minutes active, 45 minutes rest)
We’re skipping the traditional autolyse and going straight to mixing everything upfront.
- In a large bowl, mix flour, water, and sourdough starter until no dry flour remains. Cover and let the mixture rest for 45 minutes.
- After resting, add the salt and mix by hand using the Rubaud method:
- Cup your hand and scoop from underneath the dough.
- Lift the dough upward, allowing it to fall back on itself.
- Repeat for about 10 minutes until the dough looks smooth and holds its shape.
2. Stretch & Fold (or Coil Fold) – 3 sets every 45 minutes
Building dough strength is essential, especially for high-hydration recipes like this one. Choose between stretch and folds or the gentler coil fold method:
- Stretch & Fold: Lift one side of the dough upward and fold it over itself. Rotate the bowl and repeat on all four sides.
- Coil Fold:
- Wet your hands to prevent sticking.
- Gently lift the center of the dough with both hands.
- Allow the dough to naturally coil under itself as you lift and fold. Rotate the bowl 180 degrees and repeat.
Perform 3 sets, with 45 minutes between each set. By the end, the dough should feel strong, elastic, and less sticky.
3. Shape the Dough
After the final fold, let the dough rest in the bowl for 30 minutes, then shape it directly.
- Turn the dough out onto a lightly floured surface, letting gravity help pull it out of the bowl.
- Gently stretch the dough into a square without pressing out the gas.
- Fold it like a letter:
- Take the bottom edge and fold it up to the center.
- Stretch the bottom corners outward and fold them inward to slightly overlap.
- Take the top edge, stretch slightly, and fold it down towards the bottom to create a square bundle.
- For extra tension:
- Fold the top corners to the center, repeat with the middle and bottom, then roll the dough up tightly, bottom to top, to form a taut package.
- Place the shaped dough seam-side up in a floured proofing basket. Cover and let it rest on the counter for 1 hour, then refrigerate for 8–24 hours.
4. Preheat & Score
- Preheat your oven to 475°F (245°C) with your baking vessel inside.
- Pro Tip: If you plan intricate scoring, place the dough in the freezer for 15 minutes during the preheat. This firms up the surface, making it easier to score, especially in warm weather.
5. Bake
- Remove the dough from the fridge, transfer it to a piece of parchment paper or bread sling, and score the top using a lame or sharp knife.
- Using the parchment or sling, carefully lower the dough into the preheated baking vessel.
- Bake:
- Covered for 22 minutes.
- Uncovered for 10–15 minutes, or until the crust is golden brown and the internal temperature reaches 200°F (93°C).
- Let the loaf cool completely before slicing—it’s worth the wait!

Troubleshooting & Common Mistakes
| Issue | Cause | Solution |
|---|---|---|
| Dough is too sticky | High hydration | Use wet hands for handling, and practice coil folds. |
| Dense loaf | Underproofed | Allow more time during bulk fermentation, and ensure your starter is active. |
| Flat loaf | Poor shaping or weak gluten | Focus on creating tension during shaping, and ensure enough stretch & folds. |
| Pale crust | Oven not hot enough | Preheat your oven and baking vessel thoroughly. |
Final Thoughts
This sourdough recipe is my pride and joy. It’s the loaf I bake when I want to impress or just enjoy something familiar and comforting. Sourdough baking is a journey, and every loaf teaches you something new.
If you bake this, I’d love to see your results! Share your photos and tips in the Baking Great Bread at Home group, and don’t forget to tag me. Let’s keep inspiring each other to bake our best!
Nutrition Facts (per slice, ~50g)
| Calories | Carbs | Protein | Fat |
|---|---|---|---|
| 110 | 22g | 4g | 0.5g |
Links & Resources
- Sourdough Starter Guide – Learn to keep your starter strong.
- Brød & Taylor Baking Shell – My favorite tool for consistent results.
- Join the Facebook Group – Connect with thousands of bakers for tips and feedback!
- My sourdough baking process.