

Have you ever wondered why some bakeries have such amazing bread with complex flavors that seem impossible to replicate at home? The secret might be sitting in your kitchen already – your refrigerator! Let’s dive into the wonderful world of cold fermentation and discover why it’s a game-changer for home bakers.
The Magic of Cold Fermentation
When you slow down fermentation by using your refrigerator (a process often called cold proofing or retarding), something magical happens. The yeast slows down, but the enzymes in your dough keep working, breaking down complex carbohydrates into simpler sugars. This creates deeper flavors and better texture in your final bread.

Benefits of Refrigerator Proofing
During cold fermentation, enzymes have more time to break down starches into sugars, creating more complex, almost nutty flavors. This is why artisan sourdough has such depth – it’s not just about the starter, it’s about time and temperature.
More Flexible Schedule
One of the best things about using your fridge is that it puts you in control, not the dough. Need to delay baking because life got busy? No problem! Your dough can usually wait in the fridge for 12-72 hours, depending on the recipe.
Easier Dough Handling
Cold dough is often easier to shape and score. The chilled gluten structure becomes more stable, making it simpler to achieve those beautiful designs you see on social media.
Better Crust Development
The long, slow fermentation helps develop proteins that contribute to better crust formation. You’ll notice a crispier, more golden-brown crust on breads that have been cold-proofed.

“The telltale signs of perfectly cold-proofed dough: a smooth, taught surface with subtle bubbles beneath the flour, showing just the right amount of fermentation. This loaf is ready for scoring and baking after its overnight rest in the fridge. 🥖”
How to Use Your Fridge for Better Bread
Bake straight from cold (just add a few minutes to baking time)
First Rise (Bulk Fermentation)
-
- Let your dough rise at room temperature until it increases by about 50%
-
- Place in a lightly oiled container
-
- Cover and refrigerate for 12-72 hours
Second Rise (Final Proof)
-
- Shape your cold dough
-
- Place in proofing baskets or pans
-
- Return to fridge for 8-16 hours
Tips for Success
- Tips for Success
- Watch dough strength – very long cold ferments can eventually break down gluten or
- Use a container with room for expansion
- Keep dough covered to prevent drying
- The longer the cold fermentation, the more sour/complex the flavor
Common Questions Answered
Q: Won’t the cold kill my yeast? No! Yeast goes dormant in cold temperatures but wakes right up when warmed. Think of it as pressing pause on fermentation.
Q: How long can I leave dough in the fridge? Most enriched doughs (with butter, eggs) can go 24-48 hours. Lean doughs (just flour, water, salt, yeast) can often go up to 72 hours or even longer.
Q: Do I need to bring the dough to room temperature before baking? Usually not! Most breads can go straight from fridge to oven. Just add 2-5 minutes to your usual baking time.

“Cold-proofed dough holds its shape beautifully when scoring, allowing for precise, artistic designs that will open dramatically during baking. Notice how cleanly the lame cuts through the chilled dough. 🗡️”
Getting Started
Try cold proofing with a simple recipe first, like basic white bread or dinner rolls. Once you see the difference in flavor and texture, you’ll understand why professional bakers have used this technique for generations.
Remember: great bread isn’t about rushing – it’s about giving time for flavors to develop. Your refrigerator is the tool that makes this possible in our busy modern lives.
Happy baking! 🥖
Share your cold-proofed bread successes with us using #BakingGreatBreadAtHome
Would you like specific recipe recommendations optimized for cold proofing? Let us know in the comments below!

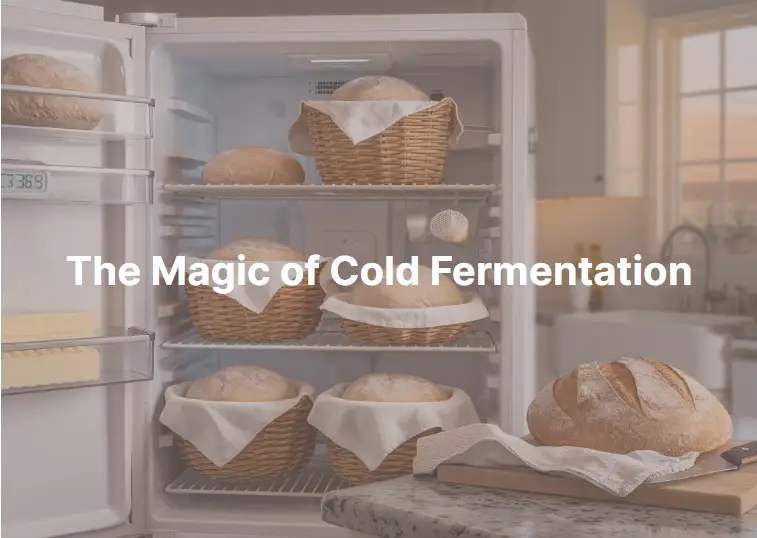
“A home baker’s perfect morning: Multiple loaves cold-proofing in wicker bannetons at an ideal 38°F, while yesterday’s freshly baked sourdough rests on the cutting board. Notice the organized fridge setup with dedicated space for butter and proofing baskets – a testament to how cold fermentation can help you bake better bread while fitting into your daily routine. The warm morning light streaming through the kitchen window reminds us that these loaves will soon be ready for the oven! 🌅🍞”
This blog is The Property of
Baking Great Bread at Home
Thanks for visiting http://www.bakinggreatbread.blog
👋