
The Heated Truth About This Game-Changing Bread Tool 🍞

“The future of bread baking weighs less than your flour bag”
Let me start by saying that I’ve been a Dutch oven guy for years. My Dutch ovens are solid, heavy, and have been with me through thick and thin. They’ve given me some of my best bakes, and there’s a comforting heft to them that I’ve always valued. So, when Brød & Taylor sent me their Baking Shell, I was intrigued but skeptical. It’s beautifully designed—like everything Brød & Taylor makes—but it’s also lightweight, which had me wondering: Could this really replace my trusty cast iron?
The Game-Changer: A New Way to Steam
Here’s what stopped me in my tracks: while my Dutch oven sits in the oven for a good 30 minutes past preheating (let’s be honest about our energy consumption here), the Baking Shell is ready to go the moment your oven reaches temperature. It’s not just about convenience – it’s about efficiency. And when paired with their baking steel? That’s where the magic really happens.

The Test: My Foolproof Sourdough Recipe 🥖
For this test, I went with my Foolproof Sourdough Recipe, a 75% hydration loaf that many of you in the group know well. It’s a recipe that’s been baked hundreds of times, so I knew I’d be able to tell immediately if this shell was up to the challenge.
My Foolproof Sourdough Recipe 🥖
For this test, I went with my Foolproof Sourdough Recipe, a 75% hydration loaf that many of you in the group know well. It’s a recipe that’s been baked hundreds of times, so I knew I’d be able to tell immediately if this shell was up to the challenge.
Henry’s Foolproof Sourdough Recipe
A 75% hydration sourdough batard, ideal for comparing the performance of the Brød & Taylor Baking Shell and a Dutch oven.
Ingredients:
- 500g bread flour
- 375g water
- 100g active sourdough starter
- 10g salt
Instructions:
Fermentation:
- Combine 500g bread flour, 375g water, and 100g active starter in a large bowl.
- Mix until just combined, cover, and rest for 45 minutes.
Add Salt & Mix:
- Sprinkle in 10g salt.
- Mix until smooth and elastic using a push-and-pull method for about 10 minutes.
Bulk Fermentation:
- Cover the dough and let rest at room temperature for 4-6 hours.
- Perform 4 sets of coil folds over the first 2 hours.
Shape & Overnight Proof:
- Shape the dough into a batard.
- Place in a floured proofing basket.
- Let proof overnight in the fridge.
Preheat & Bake:
- Preheat oven to 475°F (245°C) with a baking steel or stone inside.
- Place shaped dough onto preheated steel.
- Cover with Baking Shell and bake for 22 minutes.
- Note: Baking Shell is a specialized baking environment that simulates a professional oven’s conditions, enhancing the bread’s crust and overall texture.
- For Dutch Oven Method:
- Preheat the Dutch oven alongside.
- Follow the same timing.
- After 22 minutes, remove the shell (or lid).
- Continue baking uncovered for 15-20 minutes until the crust reaches the desired color and the internal temperature hits 200°F.
Cool & Slice:
- Let the loaf cool completely before slicing.
⏱️ Timing:
- Servings: 1 loaf
- Prep Time: 45 minutes (plus overnight proof)
- Cook Time: 45-50 minutes
- Total Time: Approximately 1 day
Troubleshooting Tips
Baking sourdough can sometimes present challenges, even with a tried-and-true recipe. Here are some common issues you might encounter while making My Foolproof Sourdough Recipe 🥖 and how to resolve them:
1. Dough Not Rising Properly
- Causes: Inactive starter, temperature fluctuations, insufficient fermentation time.
- Solutions:
- Refresh Your Starter: Ensure it’s bubbly and active by feeding regularly.
- Maintain Optimal Temperature: Keep dough in a warm, draft-free area (75°F to 80°F).
- Extend Fermentation Time: Allow more bulk fermentation if needed.
2. Crust Too Thick or Too Thin
- Causes: Oven temperature issues, inconsistent baking methods, dough hydration levels.
- Solutions:
- Verify Oven Temperature: Use an oven thermometer.
- Consistent Baking Methods: Stick to one method and follow timing precisely.
- Adjust Hydration: Slightly modify water content for desired crust thickness.
3. Bread Too Dense or Not Airy Enough
- Causes: Under-kneading, incorrect proofing times, poor shaping.
- Solutions:
- Ensure Proper Kneading: Mix until smooth and elastic.
- Monitor Proofing Times: Avoid over or under-proofing.
- Shape Effectively: Shape dough tightly to create surface tension.
4. Crust Not Developing Properly
- Causes: Lack of steam, insufficient baking time, inappropriate baking surface.
- Solutions:
- Use Baking Steel or Stone: Promotes better crust development.
- Implement Steam Techniques: Use Baking Shell or Dutch Oven to trap steam.
- Extend Baking Time: Bake until internal temperature reaches 200°F.
5. Handling Wet, Sticky Dough
- Issue: This is a wet dough, so it needs to be handled with confidence. Sticky dough can be challenging to work with and may stick to your hands and tools.
- Solutions:
- Use Wet Hands: Dampen your hands with water to prevent sticking.
- Use a Bench Scraper: Helps lift and turn the dough without sticking.
- Chill the Dough Slightly: Refrigerate for 15-20 minutes to make it firmer.
- Properly Flour Your Workspace: Lightly dust your work surface and tools, avoiding excess flour.
Final Tips
- Patience is Key: Allow adequate fermentation and proofing periods.
- Keep Detailed Notes: Document each bake to refine your technique over time.
- Stay Consistent: Consistent measurements and methods lead to more predictable results.
By addressing these common issues with the provided solutions, you’ll enhance your sourdough baking skills and achieve delicious, well-textured loaves every time.
Happy Baking! 🍞🥖
Additional Resources
If you’re enjoying my Foolproof Sourdough Recipe and want to master sourdough baking from the ground up, check out my book, Vitale Sourdough Mastery. It has detailed guides, tips, and insights to elevate your baking game. https://a.co/d/hz6TQcM

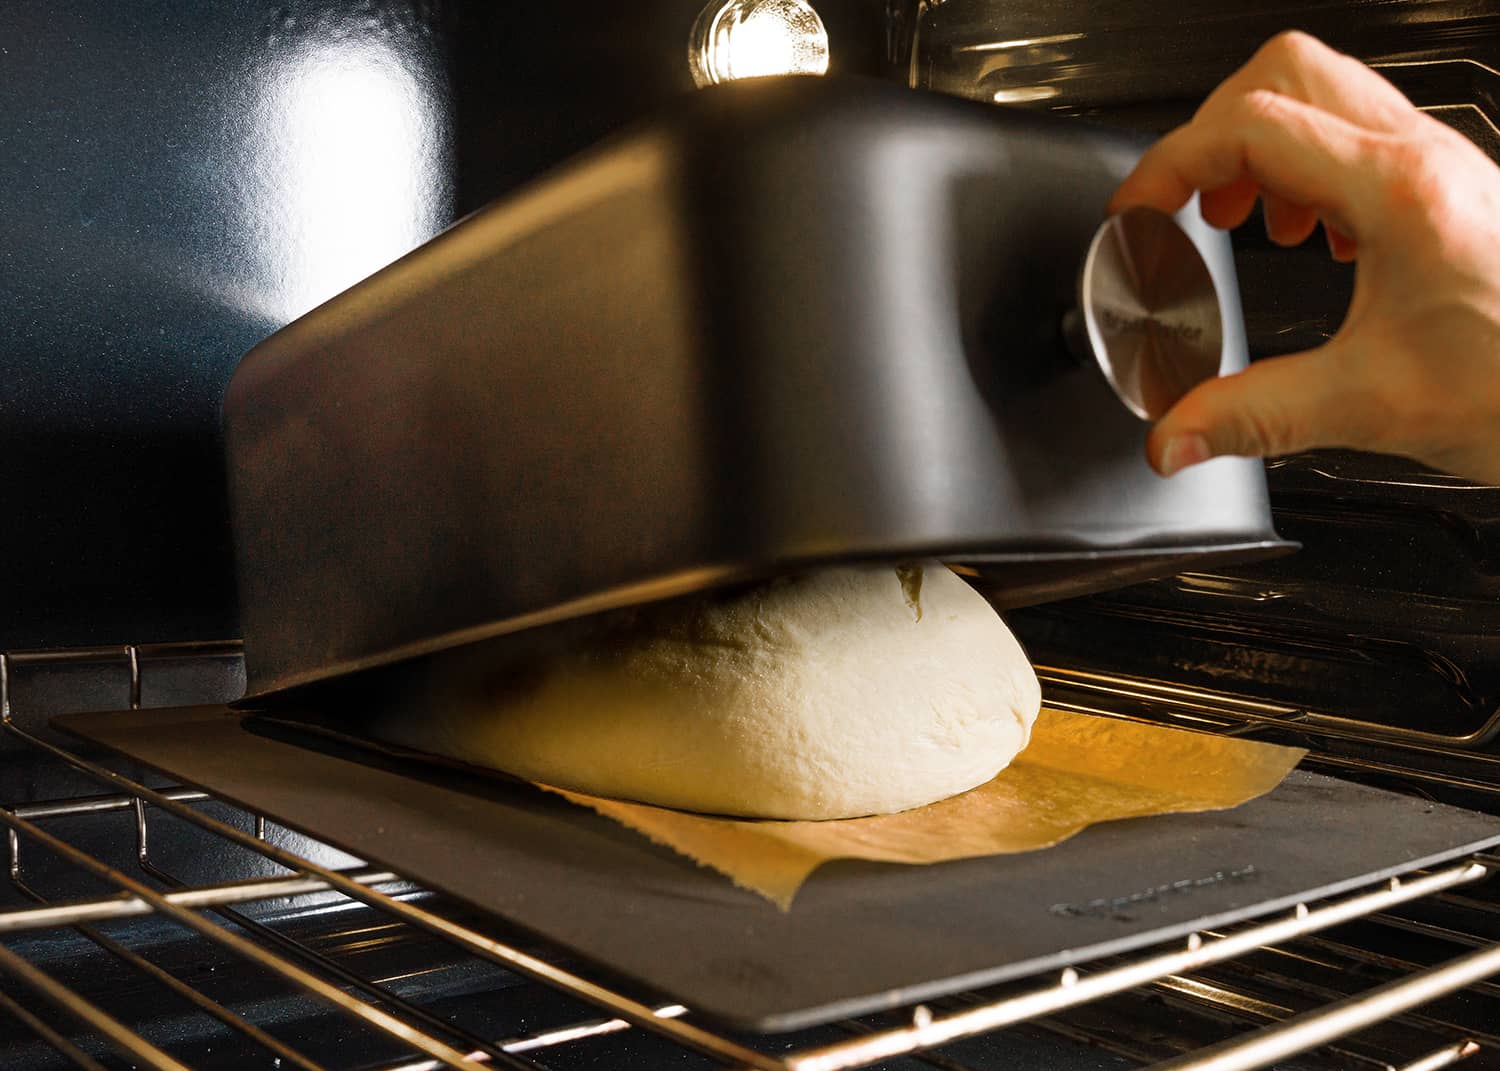
A Different Kind of Bake: How the Baking Shell Works 🔍
Here’s where the Baking Shell really stands out. Instead of placing the dough directly in a heated vessel like a Dutch oven, you place it on a preheated baking steel (or stone) and cover it with the shell. This creates a steam-filled environment that mimics a Dutch oven but with less hassle. You get that intense heat transfer from the steel below, and the shell traps the steam, encouraging a good rise and forming a nice crust.
Pro Tip: 💡 Because the Baking Shell itself doesn’t need to be preheated, you save some time. But you still want to make sure that your steel or stone is thoroughly heated, so it can give the dough the blast of heat it needs when it first goes in. This approach is all about making the most of that initial oven spring.
The Big Reveal: Uncovering the Loaves ✨
After 22 minutes, it was time for the moment of truth. If you’re a baker, you know this moment well—it’s the first time you get to see what your dough has turned into. For me, it’s the prettiest stage of the bake. The dough is puffed up, the crust is starting to form, and everything is still full of potential.
Both loaves looked beautiful when I took off the covers:
-
- Dutch Oven Loaf: Deep, crackly crust
-
- Baking Shell Loaf: Well-risen with defined scoring and lovely golden color
I kept both at 475°F for the remainder of the bake—no need to lower the heat. After another 15-20 minutes, the internal temperatures hit 200°F, and I pulled both loaves out to cool.

Final Thoughts: A New Favorite? 🤔
So, after putting the Baking Shell through its paces, how do I feel about it? Well, if I were just starting out, I’d pick the Baking Shell over a Dutch oven for baking bread. It’s easier to handle, and it does a great job creating that ideal steamy environment without the weight and hassle. And let’s face it, that’s a big deal when you’re baking often.
But don’t get me wrong—my Dutch ovens aren’t going anywhere. They’ll still see plenty of use for soups, stews, and those extra-dark crusts I love. But when it comes to baking bread, the Baking Shell is a strong contender. It’s not just a flashy new gadget; it’s a practical, well-designed tool that gets the job done.
Ready to Try It? 🥖
If you’re intrigued and want to see how the Baking Shell stacks up in your own kitchen, give my Foolproof Sourdough Recipe a try. And if you’re in the market for some new baking gear, I’ve included links to my favorite Brød & Taylor products down below.
Happy baking, and here’s to new possibilities! 🎉


This review is based on personal experience with products provided by Brød & Taylor for testing. All opinions are my own.
#BreadBaking #SourdoughBread #BakingTips #BrodAndTaylor #BakingShell
If you’d like to learn more about Brød & Taylor and the products that I use, visit this link. Welcome to Brød & Taylor Product Showcase
“Baking is more than a recipe; it’s a blend of patience, passion, and a bit of yourself in every loaf.”
“This blog is the property of Baking Great Bread at Home. Some of the links in this post are affiliate links, which means I may earn a small commission if you purchase through them, at no extra cost to you. I only recommend products I trust and believe in, like those from Brød & Taylor, to help support my baking journey and this community.”
Thanks for visiting our blog!
👋