
“I think I killed my starter!”
Let me guess – you’re staring at your forgotten sourdough starter in the back of the fridge, feeling a wave of guilt wash over you. Trust me, I’ve been there! As someone who’s been baking sourdough for years, I can’t count how many times I’ve heard (or said) those panic-stricken words: “Oh no, I think I killed my starter!”
Here’s the good news: your starter is probably just taking a nap, not playing dead. Unless you’re seeing actual mold (we’ll talk about that), chances are your little fermented friend can bounce right back to life.

The Tale of My Neglected Starter, Vitale
My own starter, Vitale, has survived more “forgotten in the fridge” episodes than I’d like to admit. The last time I rescued her, she looked absolutely horrifying – thick black liquid on top, crusty bits along the jar’s sides, and a smell that could strip paint! But guess what? Within 48 hours, she was bubbling away like nothing had happened.

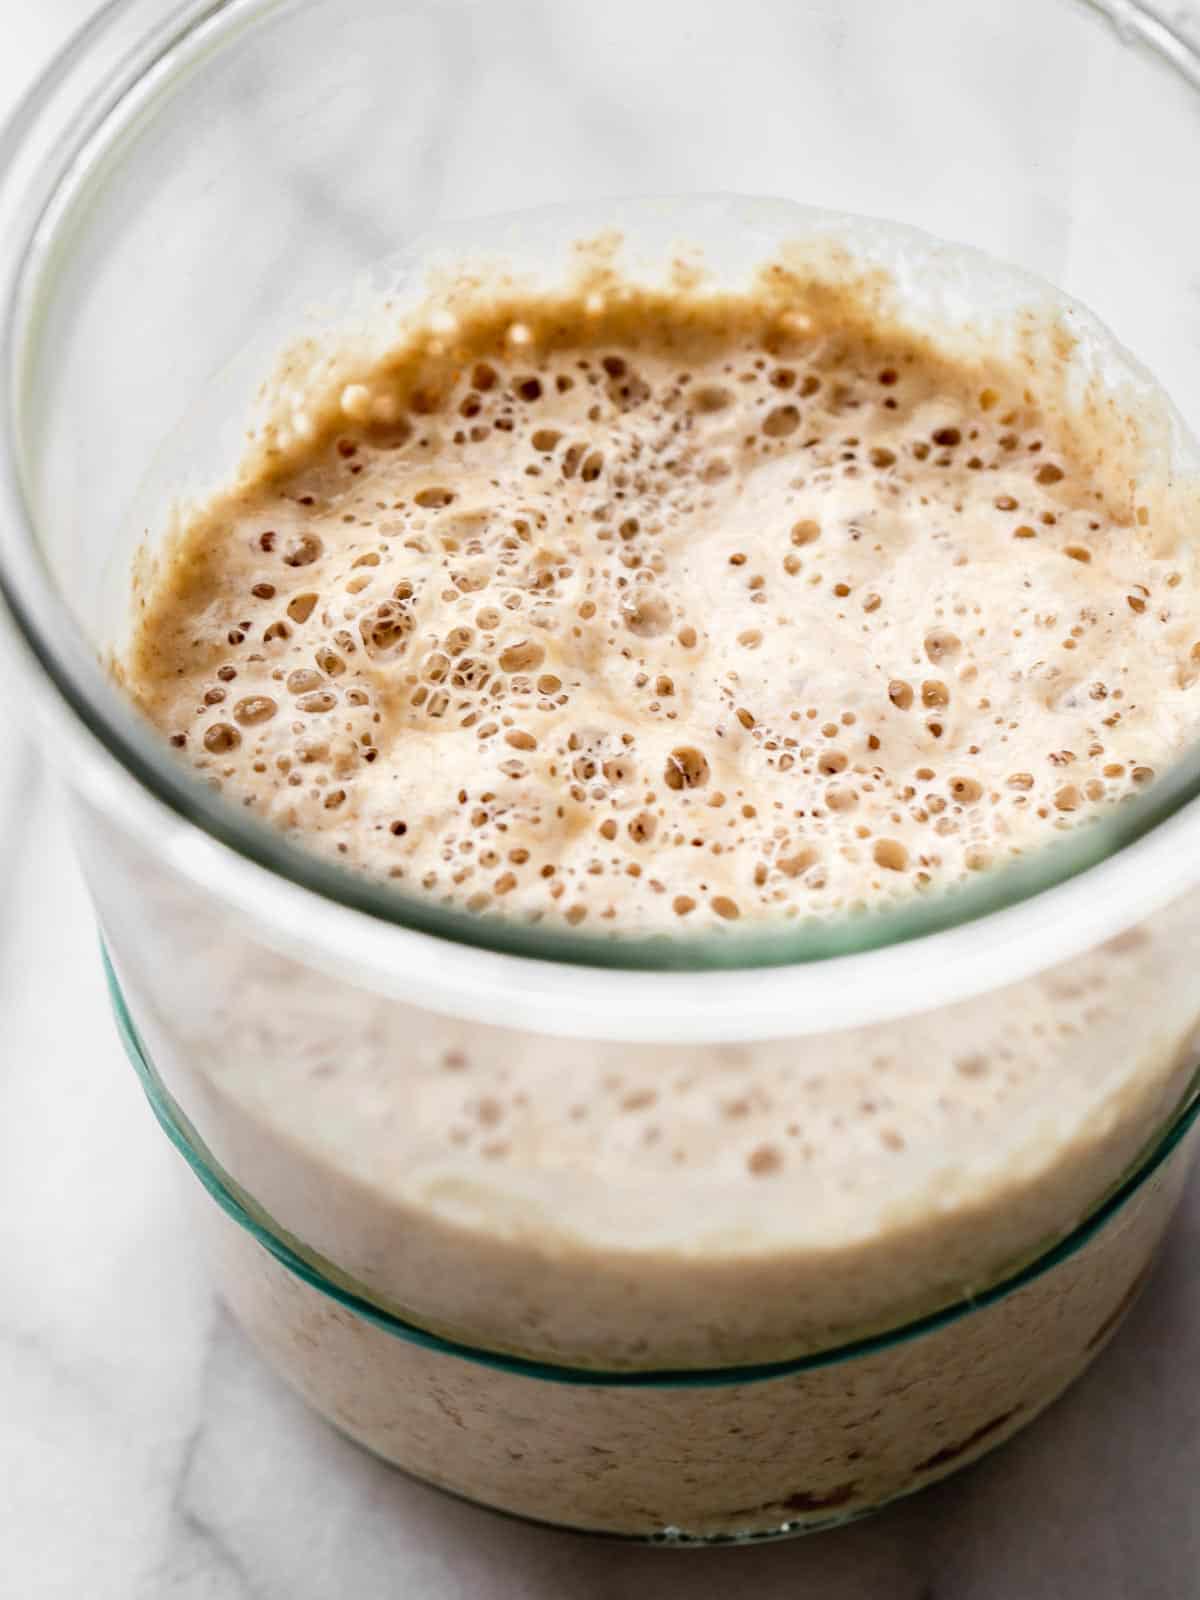
What’s That Scary Black Stuff?
If you’re seeing a dark liquid layer on top of your starter, don’t panic! That’s just hooch – basically your starter’s way of saying “Hey, I’m hungry!” When your starter’s been chillin’ in the fridge for a while, this hooch can turn really dark, even black. And yes, it might smell like nail polish remover or something equally industrial. But trust me, this is totally normal for a hungry starter.
The Only Deal-Breaker: Mold
Here’s the one thing you actually need to worry about: mold! If you spot anything fuzzy or green growing on your starter, that’s game over. Mold spores are sneaky little things that can contaminate the whole batch, so if you see mold, you’ll need to start fresh. No exceptions on this one – better safe than sorry!

Bringing Your Starter Back to Life
Ready to revive your sleepy starter? Here’s my tried-and-true method:
- Dump off that dark hooch layer – don’t stir it in when it’s this old
- Keep just a tiny bit of the old starter (about 20-30g)
- Give it a monster feeding: 100g flour + 100g water
- Let it hang out at room temperature for 12 hours
- Discard all but 50g and feed it again (another 100g each of flour and water)
- Wait another 12 hours – by now it should be showing signs of life!
Pro tip: Add the water first and give the jar a good shake before adding flour. This helps wake up those sleepy yeast cells faster!

The Art of Feeding Your Starter
Let’s get into the nitty-gritty of feeding your starter. This process might seem fussy at first, but trust me, it’ll become second nature:
Basic Feeding Schedule
- Start with your existing starter
- Remove all but 50g (this is your “mother”)
- Add 100g of room temperature water
- Add 100g of flour (I use bread flour but AP will work)
- Mix thoroughly until no dry flour remains
- Mark the level on your jar (trust me, this helps! I use a rubber band)
- Let it sit at room temperature for 12 hours
This ratio (1 part starter : 2 parts water : 2 parts flour) is your basic feeding formula. I like to call it the “1-2-2 method.”
For a more in depth look at creating and maintaining your sourdough starter, check out our guide. https://bit.ly/3Z3YrpT
How to Know If Your Starter is Happy
After feeding, your starter should:
- Pass the float test (a small amount should float in water when ready)
- Double in size within 6-8 hours at room temperature
- Have a pleasant, slightly tangy smell
- Show lots of bubbles throughout

Troubleshooting Common Issues
- Not doubling? Your starter might be too cold or need another feeding
- Rising and falling too quickly? Try using cooler water
- Liquid forming on top? That’s hooch – your starter is hungry and needs feeding
- Strange smell? Feed it more frequently for a few days
Pro Tips for Maintenance
- Use unbleached flour for best results
- Keep your starter in a clear container to monitor growth
- Room temperature should be around 70-75°F (21-24°C)
- Mark the starting level on your jar with a rubber band
- Take photos of your starter’s progress (great for troubleshooting!)
Remember, consistency is key with sourdough starters. Pick a feeding schedule that works for you and stick to it. Your starter will adapt to your routine!
Pro tip: Add the water first and give the jar a good shake before adding flour. This helps wake up those sleepy yeast cells faster!
My Best Tips for Starter Success
- Don’t stress if it takes a few feeds to get back to full strength – some starters are just drama queens
- Once your starter’s back in action, consider dehydrating some as a backup (I learned this the hard way!)
- Try to feed your starter at least monthly, even in the fridge
- Invest in a good kitchen scale – eyeballing feeds is like playing Russian roulette with your bread
Remember, sourdough starters are a lot like cats – they have nine lives and are surprisingly resilient. Even when they look dead, they’re usually just waiting for their next meal!
Advertisement

Keep Your Starter Happy, Effortlessly
Caring for a sourdough starter means keeping it at the right temperature—warm enough to stay active, but not too hot to stress it out. If you’ve ever struggled with an underperforming starter in the winter or an overly aggressive one in the summer, Goldie by Sourhouse™ might be the perfect solution.
Goldie provides gentle, consistent warmth to keep your starter in the ideal range of 75-82ºF (~24-28ºC)—the “Goldilocks Zone” where fermentation thrives. No more guessing, no more cold spots, just a happy, bubbling starter ready to bake when you are.
With its sleek design, easy-to-read thermometer lights, and a cooling puck for hotter days, Goldie is a smart, low-energy addition to any baker’s setup.
📌 Want to learn more? Check out Goldie here: https://sourhouse.co/pages/goldie
Leave a Reply